


The Pre-Installation Checklist for LVT Flooring Installations

Industry specialists, contractors, and installers contribute in different ways to provide a successful LVT flooring installation. These guidelines help to fully understand the requirements for prepping and installing a luxury vinyl flooring solution. While reading through pertinent manufacturer guides is critical to a proper installation, let’s take a moment to highlight some key points as a reference for you and your team.
TAJ’s Pre-installation Checklist for LVT Flooring
Let’s start at the foundation and work our way up to the installation of LVT flooring.
Before we dive in, just a friendly reminder to REVIEW ALL TECHNICAL MATERIALS. The following is simply a checklist intended to be used as a quick reference for key points culled various technical documents and our LVT flooring installation instructions. It’s going to make every logistical part of the job more successful.
Technical reference materials for an LVT flooring installation include (and are not limited to):
- Specification sheet
- Installation instructions
- Maintenance guide
Assess the Situation
Before you get into the act of laying out your LVT flooring installation, take a look around. Take notes and make sure that the surface you are about to work with is ready and fully prepared—taking into account any specific suggestions or requirements by your selected product instructions:
- Subfloor evaluation and conditioning (there may be differences between a new construction LVT flooring installation and a renovation job).
- For new construction, perform a bond test to make sure there are no existing elements that would cause impediment between adhesive and product.
- Remove existing product and adhesive if applicable (see Perform Necessary Tests: Asbestos-Containing Material prior to the removal process).
- Consider skim coating before applying new adhesive to smooth slight surface imperfections.
- Evaluate the subfloor joints to understand how to address the transitions upon the application of flooring or the prep materials required.
- Utilize a self-leveling compound if the conditions exceed the capabilities of skim coating.
- Self-leveling can address two things: It can make the floor level from side to side and/or it can bring high and low spots within the floor level with one another. Identify whether the surface will need to be leveled (to correct sloping issues with the concrete slab or joists) or flattened (remedying any bumps, dimples, or imperfections that are visible on the surface).
Perform Necessary Tests
This falls hand in hand with assessing the situation. Take into account these environmental variables:
- Moisture and Temperature: Perform a test of subfloors and concrete substrates to understand levels of moisture present. Substrate moisture is expressed in terms of Moisture Vapor Emissions Rate (MVER) or Relative Humidity (RH%).
- Concrete Alkalinity or pH: A test is used to detect the alkaline value of the concrete surface. While alkalinity is a natural component of concrete, if a high alkalinity level is present, it may compromise the bond between the adhesive and floor covering.
- Bond: A test prior to installation of a floor to ensure the adhesive used will bond to the substrate and floor covering.
- Asbestos-Containing Materials (ACM): Prior to renovation, construction, and repair, it is necessary to understand whether ACM is present and to be aware of any rules and restrictions that may affect your preparations and ability to perform further installation activity.
Verify your LVT Product
Upon receiving shipment of the ordered materials, take a visual inventory to ensure that what you have in front of you is accurate to your specification and application needs.
You should:
- Inspect your materials when they arrive for possible shipping damage, and take photos of any damage that exists (note that many manufacturers will not accept returns when cartons are opened).
- Ensure you have the right SKUs compared to the specifications and compare it to the visual/image of the product.
- Double-check that you have the proper amount of material for the project/space.
- Verify that you have the right adhesive for your environment based upon your assessment and testing (hard/soft set, high moisture, etc.).
- Verify the spread rates of the adhesive, and make sure you have enough for the space involved with your LVT flooring installation.
- Confirm the applicable sundries and tools for the job.
Acclimation of LVT Product
The general rule of thumb is to wait 48 hours before starting the LVT flooring installation process once the product has arrived on-site, so it has the time to settle into its new environment. The acclimation of the product takes the following into consideration:
- Weather
- Sunlight
- Shipping or travel from a storage warehouse to the job site
- Container storage
- HVAC environments
These elements or activities may affect the LVT flooring product in different ways, and any or all of them will be a part of the product’s journey to its installation site. Thus, allowing it time to get used to its new environment is imperative to the project’s success.
Environmental Preparation
To aid in the acclimation process, we suggest the following:
- Keep any existing HVAC equipment on before, during, and after the installation: This ensures that the product fully acclimates itself to its new environment. Having HVAC equipment on while drying will also enable a controlled process and a stronger finished product. Disable programmed HVAC that would raise, or lower temperatures based upon room use. It is important to keep the temperature as consistent as possible during the installation process.
- Plan post-installation activities accordingly: In short, allow for proper drying time with little to (preferably) no foot traffic so that the floor can set up and situate itself snuggly in place.
TIP: Take pictures before, during, and after your LVT flooring installation project to keep documented tabs on the entirety of the process and the finished product.
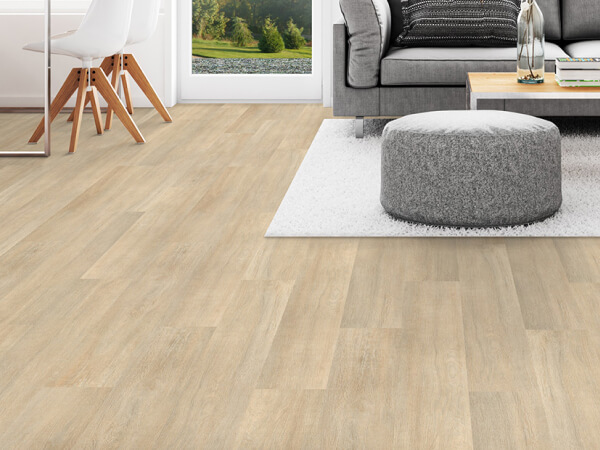
Design Layout
At the outset of any LVT flooring installation, it’s probable that a design layout exists to facilitate the goals and desired outcome of a project (and works hand in hand to ensure enough product is acquired to meet these goals). Before commencing:
- Verify the installation design layout or pattern. For example: Is it recommended to quarter turn the tile? Should the plank run vertical or horizontal?
- Know if the product has a variation to its design; mix up LVT tiles or planks if needed, or follow the manufacturer instructions.
- Try laying out a few cartons of material without adhesive. Remember, if your LVT flooring layout is not looking uniform during the process, STOP and ask questions.
- Refer to visual renderings or photos of the flooring products to ensure the proper look and layout is achieved.
Use Proper Equipment
For some, this is an obvious one; but it’s a helpful reminder that installing a floor requires more than just what’s in the box. On top of those stacks of packages being delivered to the job site, ensure that you have the right equipment to move the LVT flooring product or resilient sheet flooring around as you work. Keeping the boxes on a hand truck or forklift (depending on the breadth of the job/space) is going to be your best bet to ensure that portability and efficiency are maximized with your LVT flooring installation. Also, consider the following:
- The right trowel size for the adhesive and subfloor.
- Proper materials to protect the floor during and after the installation.
- Cleanup materials in case of spills during the installation.
- Seam welding equipment if you’re installing a resilient sheet product.
Easy to Use, Built to Last
LVT flooring installations are easy to orchestrate when all your proverbial ducks are in a row. LVT, in general, is an intuitive product designed with ease of use in mind. Through proper preparation, installation, and maintenance techniques provided by the product’s respective manufacturer, the ease of use during the installation and overall performance are points that will undoubtedly make LVT flooring products the top choice for all future commercial projects.
Questions? We’d be happy to answer them!
